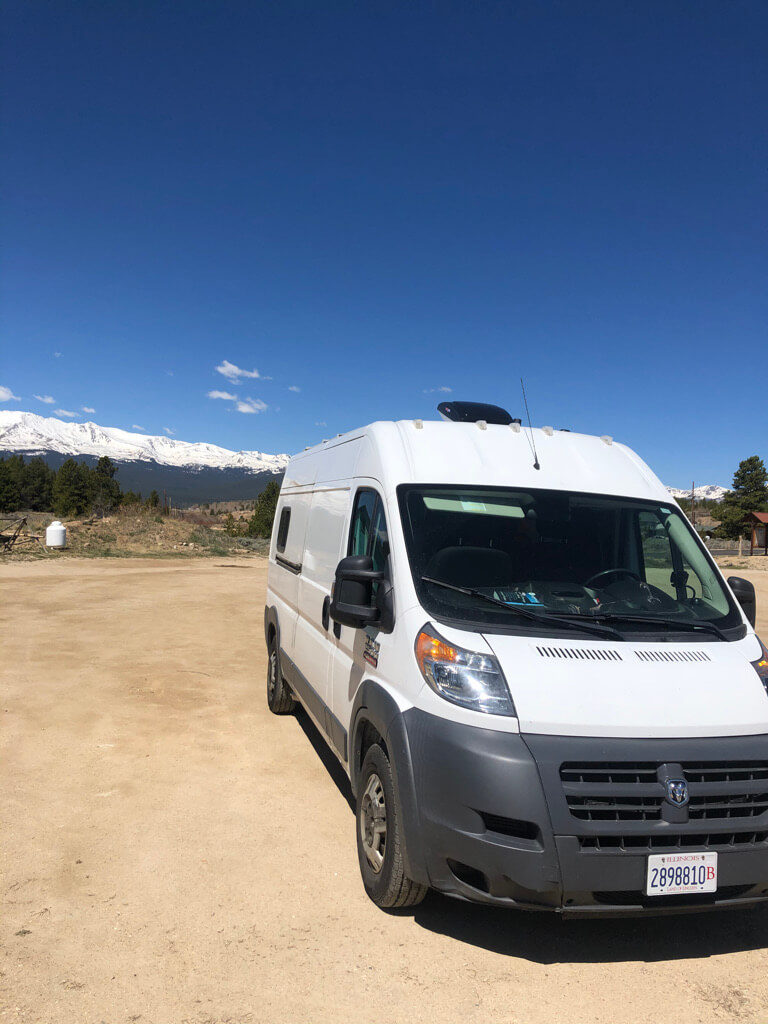
RAM Promaster Van mobile home conversion
Between November of 2020 and May 2021, I dedicated most of my time to building my dream home of wheels. It has been a labor of love and patience putting this together from CAD modeling every structure to materializing the build with carpentry work. Although my background is more aligned to software engineer and I no prior building/carpentry experience, this project is one of the proudest feats I’ve accomplished.
It’s taught me that anything can be learned and mastered with enough patience and time.
It’s taught me how to be resourceful with my time, limited set of tools, and how to make things work when all I had at times were awkwardly-shaped scrap piles of materials.
But probably most importantly, it’s brought me the confidence to build anything I can design and plan for.
Space design
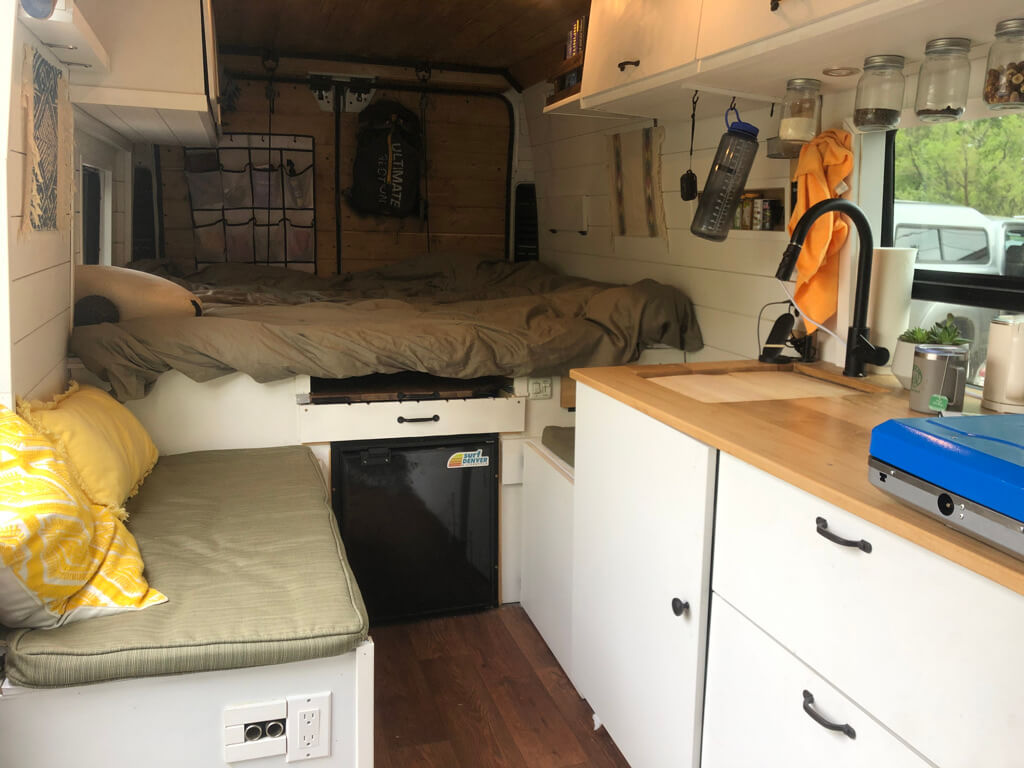
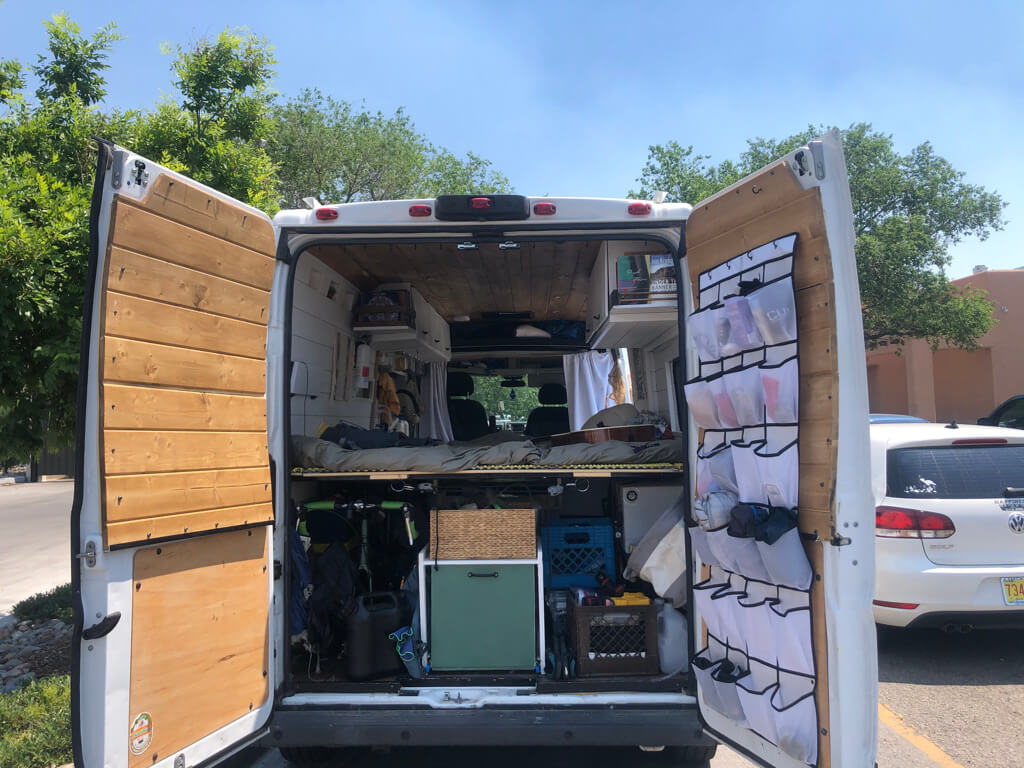
I designed the space with an open floor layout in mind. I wanted the space to feel spacious and spread out. Despite having seen many conversions on the internet with ample countertop space on both sides on the vehicle, I thought it was worthwhile to dedicate a small space for the countertop to open space for a two-couch seating area and my bed.
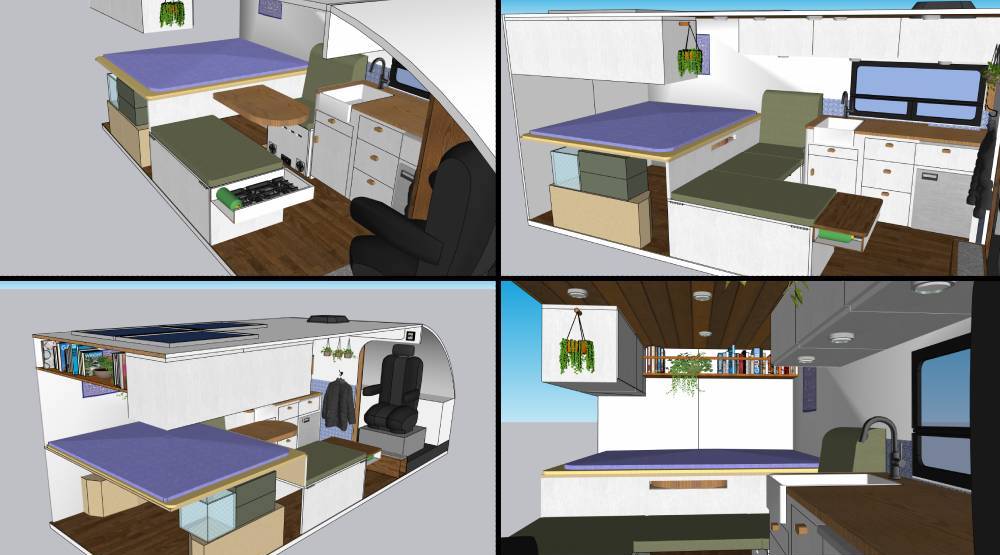
Finding ways to make the space functional and multi-use was also key. I designed my bed to fold up into a couch so I can watch movies projected on the curtains around the cab. A pull-out table was also built for dining and working, and can be stashed away when not in use.
Electrical
For my electrical setup I decided to go with the following main components:
| Battery | 2X Expert Power 100Ah Lithium Batteries |
| Solar panels | 3X HQST 100 Watt Monocrystalline Solar Panels |
| Solar Charge Controller | EPEVER 40A MPPT unit |
| Alternator to House Battery Charger | Sterling 60A DC DC unit |
| Inverter | Ampeak 1000W Inverter |
All of these components were wired with fuses or breakers within each lines, ultimately allowing me to consume power via my Ampeak inverter (120W AC outlets) or to my regular 12V DC appliances.
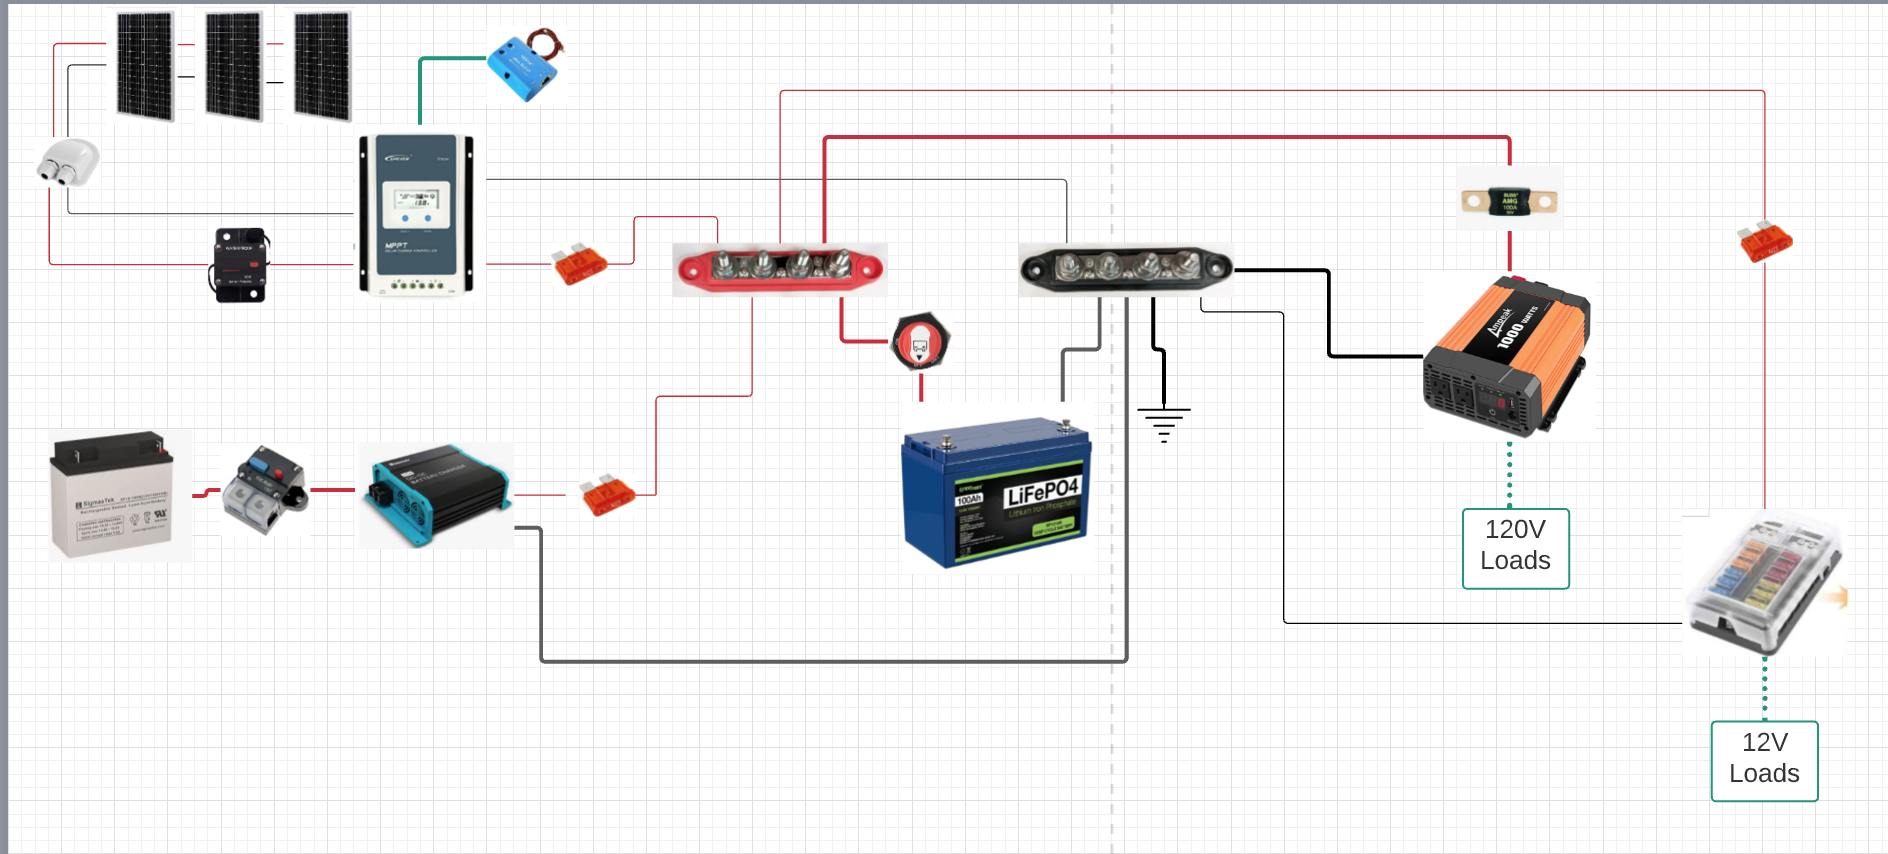
I decided to invest on lithium batteries over AGM for their ~4X total lifecycle count, 2X usable capacity, and 1/4 the weight despite their 4X price tag. I wanted to make sure I can reliably get 200Ah@12V of capacity to fuel me through several days off grid without worrying about cloudy weather making a dip in solar charging power.
I found 300 Watts of solar appropiate for keeping up with my energy usage, which I estimated to be appropiate by checking my expected daily Watt-Hour consumption against a total amount of Watt-Hours of charge provided by 300W of solar on 8 hours of sunlight. The solar output is modulated to a 14V output to charge the batteries with the EPEVER 40A MPPT unit.

The main DC appliances I used were:
| Part | Amp draw in normal/average operation |
|---|---|
| 6X Puck Lights | 1.66A |
| Chinese Diesel Heater | 1.25A |
| Fridge | 1.66A |
| Maxxair Ceiling fan | 0.6A |
| 12V cigarette style + USB sockets | 2.4A |
| Electric water pump | 0.7A |
| Toilet vent fan (just a 120mm computer fan) | 0.15A |
As for AC appliances, I will use my 800W Iron Ren kettle to make boil water for coffee every morning and charge my laptop for a few hours on occasion.
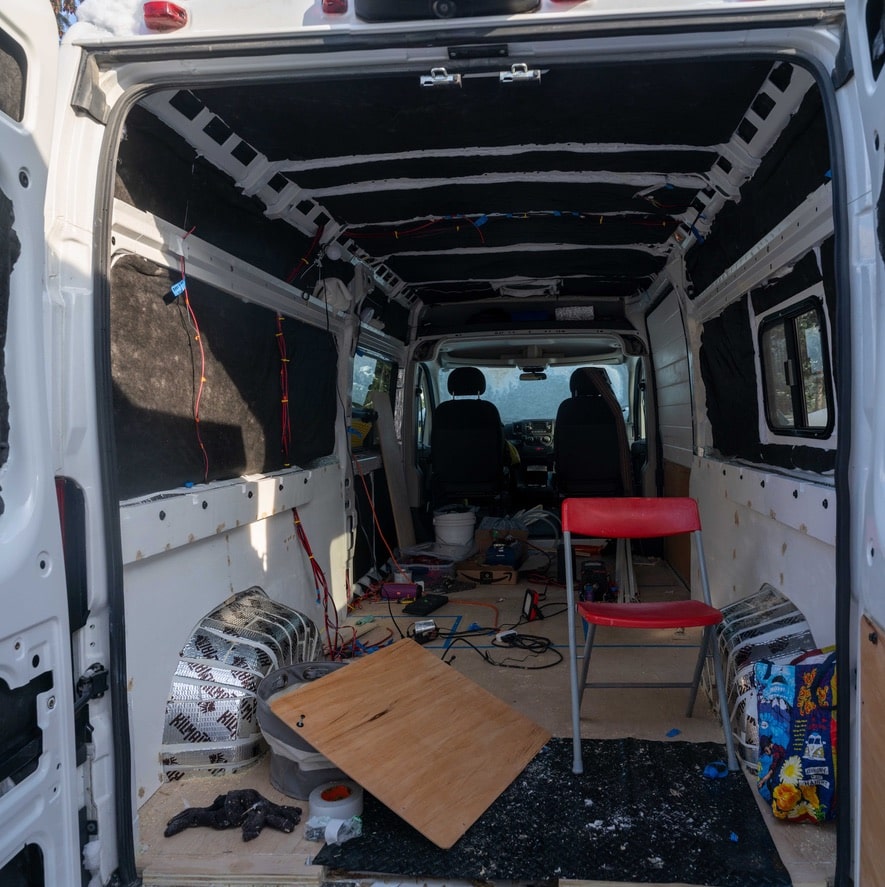
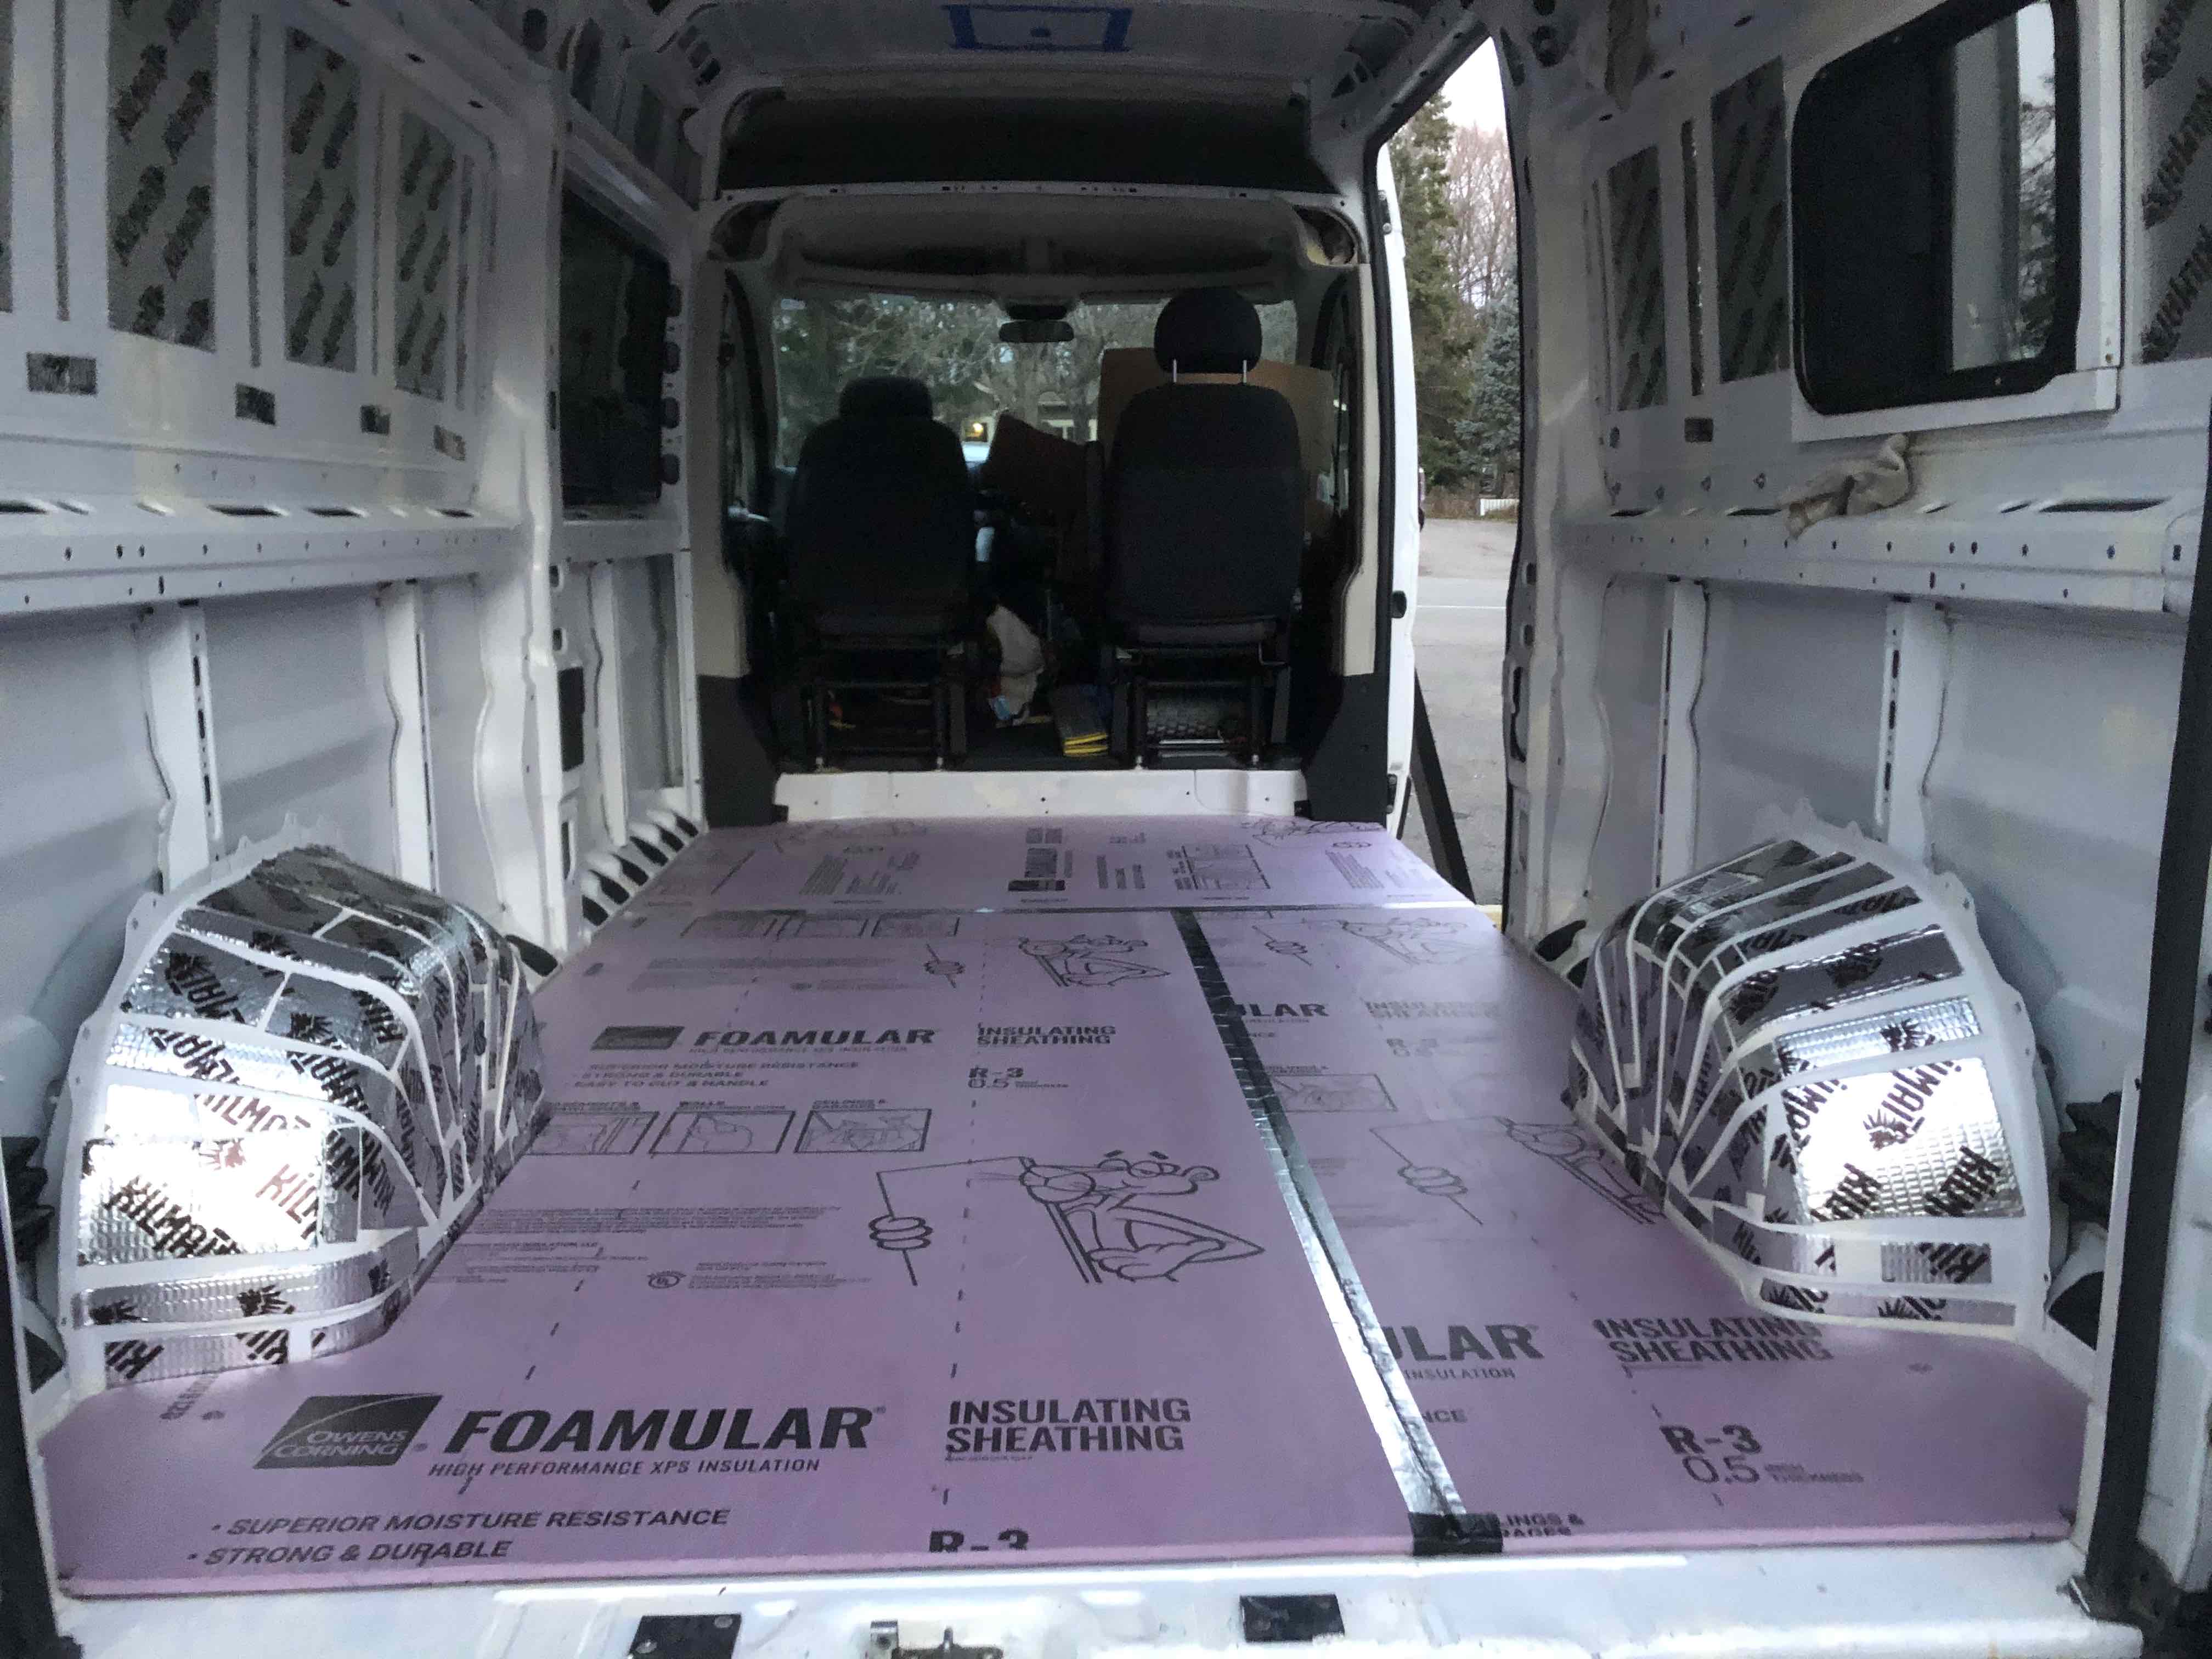
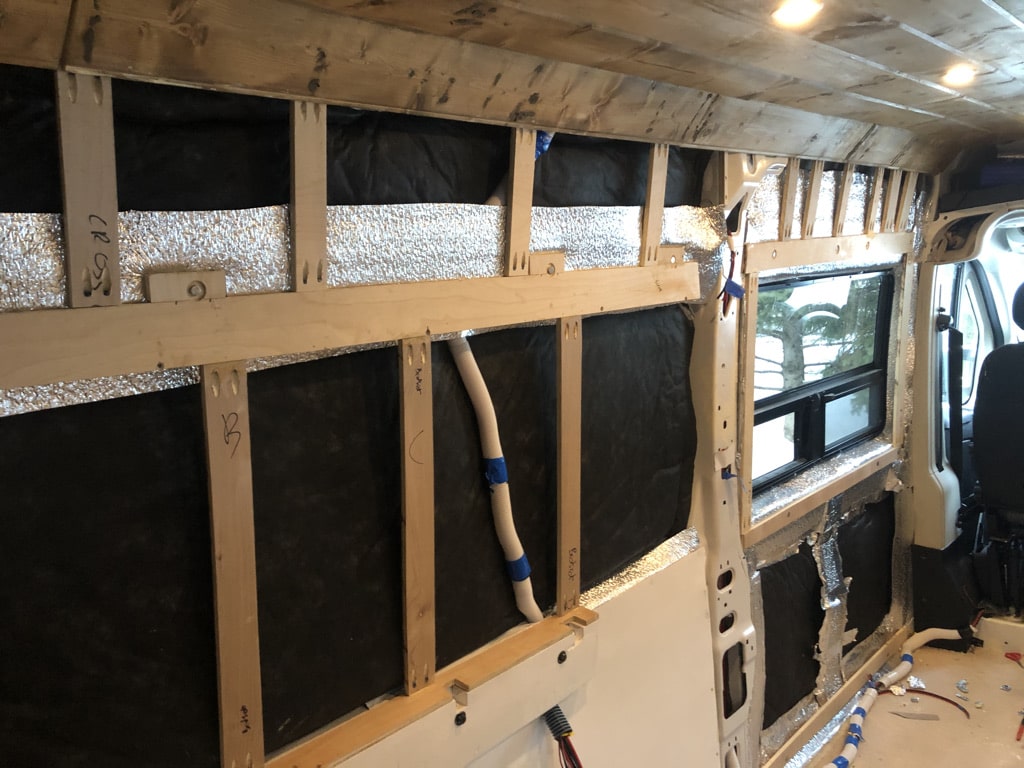
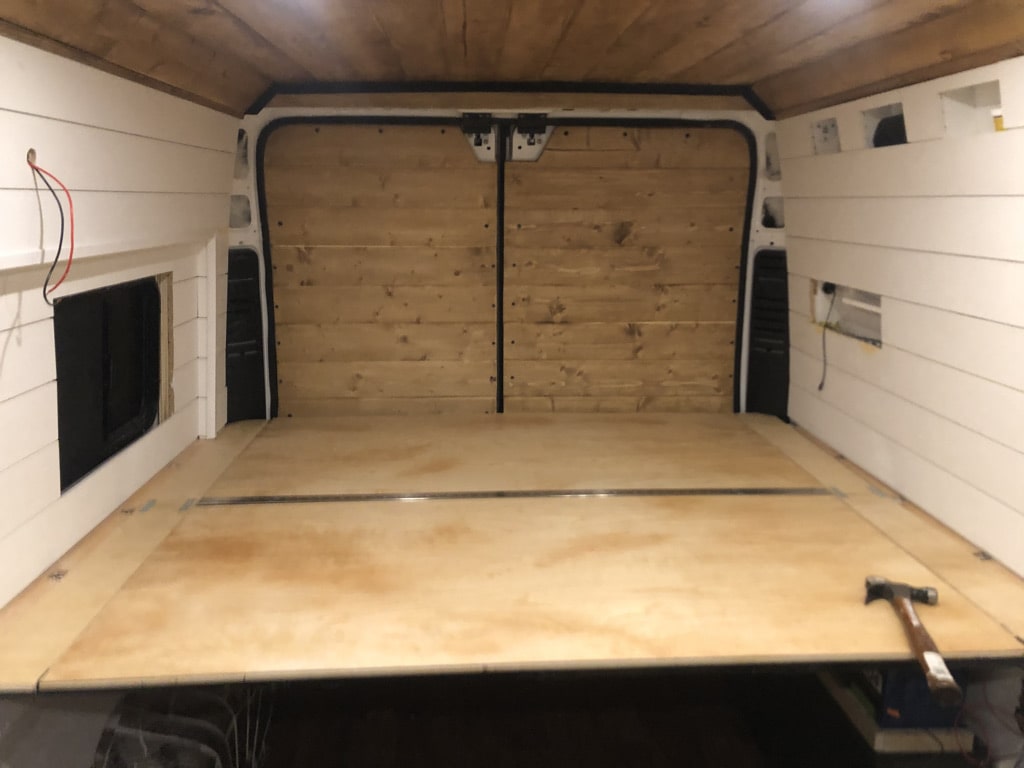
Insulation and framing
All I had was a bare metal chassis when the van was purchased. This meant a need for an insulated foundation prior to laying down walls, floors, and furniture that make up the space.
I decided to use 3M Thinsulate to insulate the walls and ceiling as this material for its extreme ease of application, doesn’t off gas and it can be easily stuffed on all the hard to reach nooks and crannies.
The floor however, needed to be insulated with a rigid material in order to install a rigid plywood sublfloor on top. I used some 1/2” thick XPS rigid board on top of the floor’s bare metal, and then laid down 1/2” thick Baltic Birch plywood on top of the XPS as per the Faroutride Floor Installation Guide.
Framing the van came down to bolting down 1/2” thick Baltic Birch plywood pieces cut into 3” wide strips where possible, with cross members simply fastened with Kreg jig holes and screws. The bolted members were fastened into the van chassis by drilling holes + placing rivnuts in the chassis. The only distinct framing member from the rest were two 2x6 studs that were bolted on the wall to serve as the bed base support, as I needed a strong foundation to mount some steel beams that made up the bed base.
Outer layers and furnishings
For walls, I nailed down 1/2” thick shiplap I purchased from Home Depot into the framing members.
For the ceiling and back doors, I used 3/4” thick pine tongue and groove panels from Home Depot, staining them with a 1/2 and 1/2 mixture of Minwax Pickled Oak and Minwax Provincial.
The floor layer consists of 1/2” thick baltic birch plywood pieces laid down flat on top of the XPS insulation layer. Other than adhesion to the XPS, I didn’t use any fastening method and the floor seems to be sturdy and stable. I then used a vinyl sheet layer adhered to the plywood.
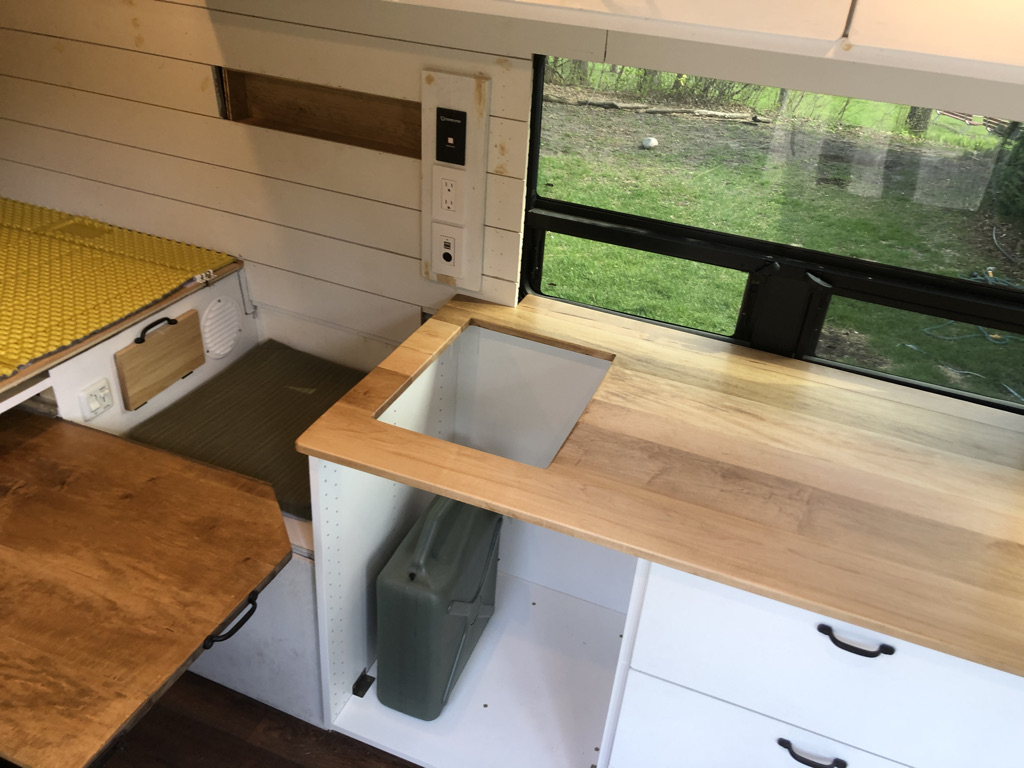
As far as furniture goes, I was a bit intimidated with carpentry work at first but I built up my skills by working on dummy projects prior to the build, like building a garage workbench and a bookshelf. The Ankeney Van Builds youtube channel was a great resource I followed for designing and building couches, kitchen countertop, and overhead cabinets. The only pre-built piece of furniture I got was a kitchen cabinet I purchased at IKEA, given the dimensions for it worked out to be almost identical to my CAD model.
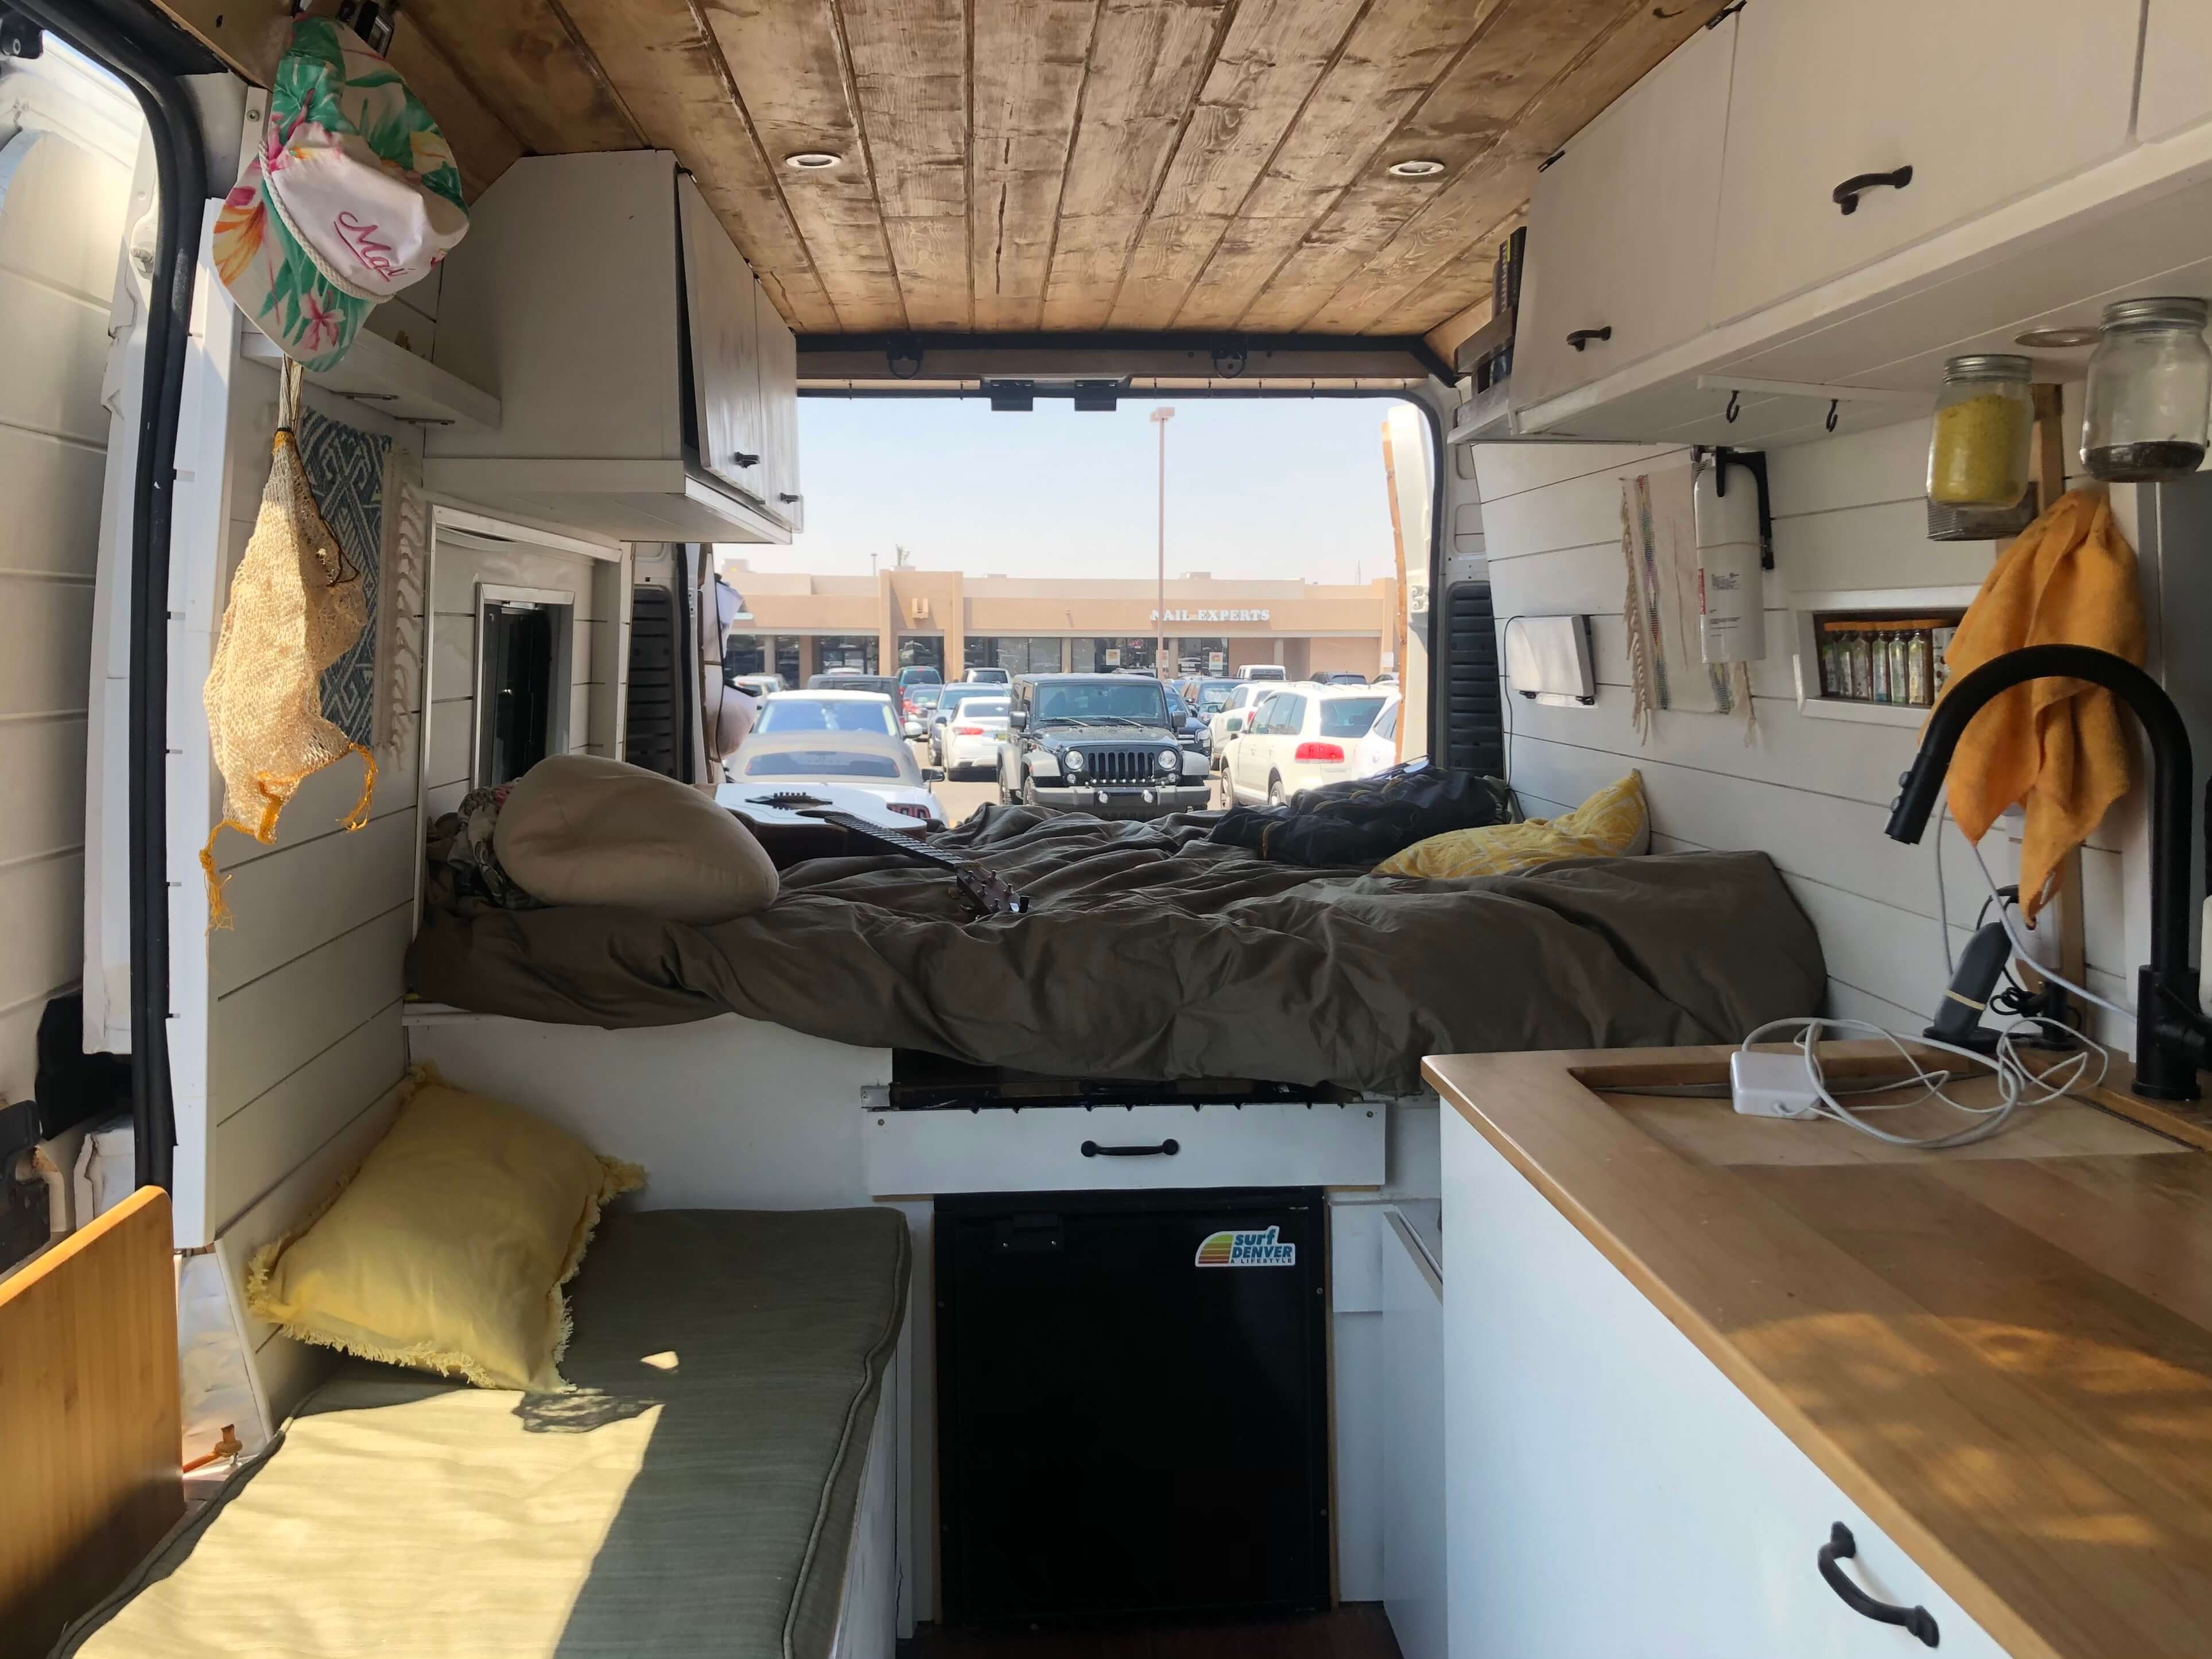
Water system
I followed the water system design laid out on this Faroutride guide. The setup is simple. No hot water. No showers. Just a 20 Gallon tank from Class A Customs routed to my sink using 1/2” thick PEX tubing (with 12V DC pump somewhere on that PEX line). Sink drain is routed to a 7 gallon aquatainer that I dump out twice a week.
Cooking / Kitchen
This one is extra simple. I’m using a portable 2 burner propane stove from Camplux to cook some of my meals. The stove is hooked up to refillable 1 lb propane bottles. I keep three of these bottles around and refill them every ~2 months. This setup works for me because I only cook with the stove once at the end of day, and some days I’ll even skip cooking and eat raw veggies / nuts / fruits. The 800W Iron Ren kettle gets me through the morning for oatmeal and coffee.
Cooking once a day means I can stash away the portable stove when not in use to make room for countertop space. I’m also happy with the choice of not going for a big 20 lb propane tank as I don’t have to use up dedicated space for this large tank. The little refillable propane bottles get me through for a long time.